So awhile ago I started a Simon project. You know the one. Repeat the sequence of colors/sounds until you inevitably screw it up. I had a working version of this game on my bread board at one point but took it all apart and saved the code for later. I never got back to finishing this project until today. Like many of my projects this one also went to the top shelf of projects "I'll get to later." Well, unfortunately most of these projects never get finished after moving up there to collect dust. So I decided to take it down and build it with whatever I had laying about. left over parts and parts from the other shelved projects were sacrificed to complete this abomination of a toy. I gave myself a 3 hour time limit on this project. Video after the jump of me showing off my incredible inability to remember the simplest of sequences.

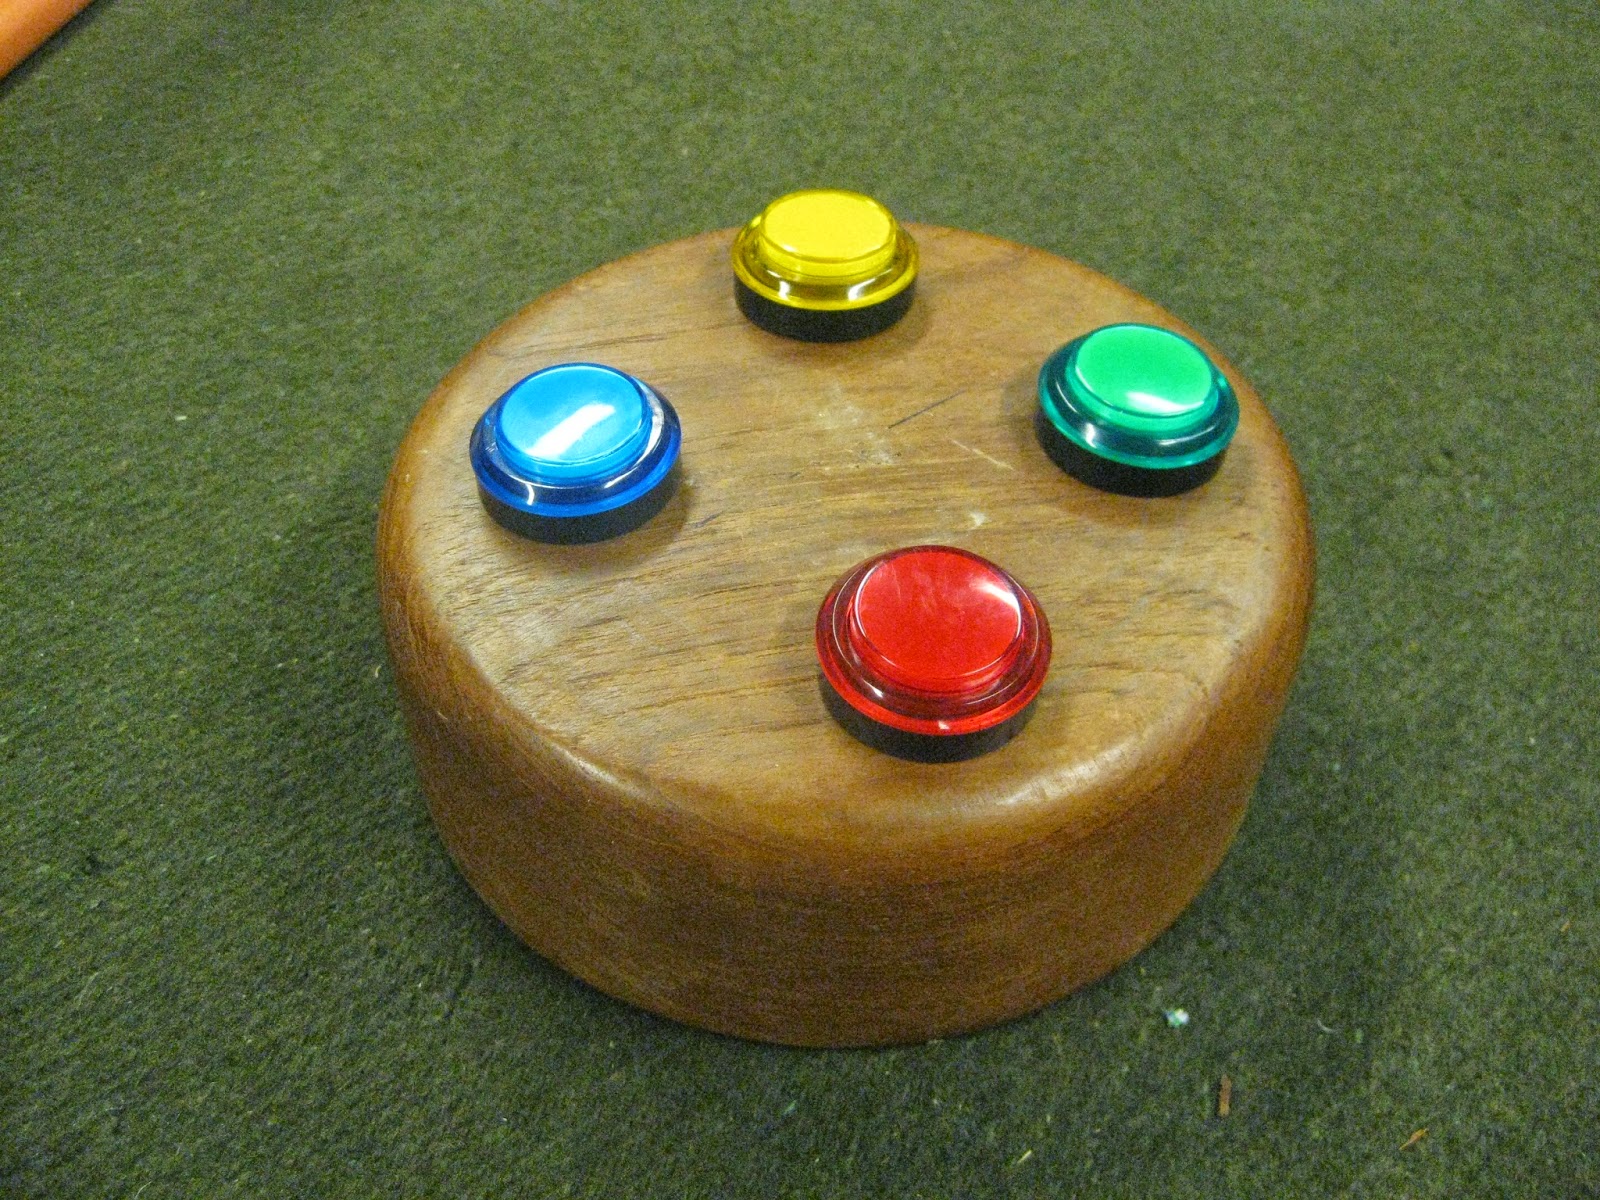
I have tried several times to find a practical use for this teak bowl I found at the thrift store. I was keeping my wallet, keys, knife, and what have you inside of here for some time, but ever since I built my arcade I have just been keeping these items on there instead. So the bowl became the first item to volunteer for this new purpose.

Left over from my original arcade prototype were these nice colorful buttons. The Red button was used in the Taunt Button Prototype. Yet another shelved project. These buttons illuminate with LED's and fit snugly inside the bowl so I actually lucked out here.

The Arduino was ripped out of a "Button Box" I was building back in the fall. It was originally intended for sending shortcuts to the computer for RSLogix 500 but it never worked the way I wanted. Menu's and such couldn't be trusted to be consistent and caused more harm then good. Although after building it I just felt wrong for not giving it a purpose. So I set out to equip it with IR and RF and turn it into a multi-function universal remote. I got as far as building a 4 x 8 button matrix and then started something else. Leaving the Button Box up on the dreaded top shelf. Today however the Button box came down and was dismantled ripping out the brains for Simon.

The speaker sitting underneath the arduino is out of one of my old computer speakers. They were taken apart and mounted in the top of my arcade cabinet. My arcade cabinet however needed more base, something these speakers and amp just couldn't provide, so I got a new set of speakers and a sub woofer leaving behind the unused parts still mounted inside the cab. I remembered this today while building and opened up the cabinet and ripped out one of the speakers. I then mounted it into the bowl with standoffs from I cant even remember what project. I realized that needing to plug this into a wall wart or any external power source would just be a silly thing to do. So I started looking around for a power source I could fit into the little space that was left. I purchased a rechargeable battery pack awhile back for the Farnsworth Communicator and thought that would be small enough to fit, but as it turned out that pack will stay up on the shelf for a little while longer. I did however find a battery pack from a flash light I had taken apart and it seemed to fit. so I used that.
Now that I had limited power I had to focus on minimizing the power consumption. For this it involved limiting the current on the inputs from the buttons and adding a power switch. Now speaking of the power switch, It is a push button switch left over from the ATX Power supply build last year. After installing it I noticed there wasn't a good way to tell if it was on due to the long initial start time. So I drilled another hole for a green LED I purchased for the "LOGIx BLOx" project I never finished. The LOGIx BLOx project was a set of blocks with individual logic gate and timer functions that could be connected by 3 conductor cables to build little logic circuits. I was designing these to help teach kids and adults alike about logic and electronics. I was never able to develop a decent prototype for the cables and connections so It was shelved. I'm still convinced I will one day build these.

To close up everything I quickly and quite crudely cut up a piece of plywood to affix to the back. I was running out of my 3 hour time limit I gave to myself so I used some Velcro to secure the plywood to the bowl. I had to trace the bowl onto the plywood due to the bowl being more of an oval than circle. The Velcro I had was left over from making a strap for my multimeter inside my toolbox.
In the video I have the game plugged in, but It is battery powered. The sound is very quiet. I havnt yet figured out why. The sequences are never the same and are totally random. The counting sounds at the end of each game count up to your score.
For a 3 hour project I can say I am decently proud of the work. This project is still however a prototype and future changes will include:
-Longer lasting battery pack and charging port
-Custom built wood enclosure
-Printed circuit board
-6 colors to contend with in a hexagonal enclosure
-potentiometer/off switch in the middle
-Custom acrylic button actuators
Special thanks to Joey for his compliance in writing any function or library I ever need.
And a big thanks to failed projects. For what would we have learned had we not first failed.
Hi,
ReplyDeleteCan I have an email add of the author of this project? I have some inquiries and hoping to hear it from him directly. Thanks for any reply.
Hello, I'm the author. what can I do for you.
DeleteHello David,
DeleteCan I ask for your personal or business email address? I have some things to discuss for this project and I think it would be better if emailed to you personally. Kindly drop me a message on my business email add, smocorro.eeweb@gmail.com. Looking forward for your response.